How to Clean a Countertop Ice Maker the Right Way
Cloudy ice, an off taste, or a slimy reservoir all mean the same thing: it is time to clean your countertop ice maker. Here is exactly how.
If you want to know how to clean a countertop ice maker, here is the short version: unplug it, drain the water reservoir, wipe out the interior with a mild vinegar-and-water solution, run one or two cleaning cycles with that solution, then run two or three cycles with plain water to rinse everything out. The whole job takes about 30 minutes of mostly hands-off time.
Countertop ice makers sit at room temperature with standing water inside, which is a comfortable home for mineral scale, mold, and bacteria. Left alone, that buildup is what turns clear cubes cloudy, gives the ice a musty or metallic taste, and eventually clogs the pump and sensors. Cleaning the unit every two to four weeks keeps the ice tasting clean and stops small problems from becoming a dead machine.


Why Your Ice Maker Needs Regular Cleaning
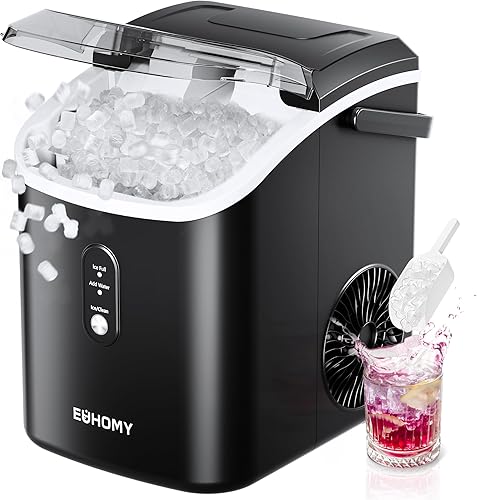
A portable ice maker works by circulating water over chilled metal prongs until cubes form, then dropping them into a basket. That same water sits in an open reservoir between uses, often for days. Two things build up over time. The first is mineral scale, the chalky deposit left behind by hard water as it freezes and evaporates; it coats the prongs and water lines and slows ice production. The second is biofilm, the slick layer of mold and bacteria that grows anywhere water stagnates in a warm room. Scale makes the ice cloudy and the machine sluggish, while biofilm is what gives ice that off smell and stale flavor. Neither is dangerous to a healthy unit if you stay ahead of it, but both compound quickly, and a neglected ice maker can develop a film you can actually see and smell within a few weeks.
How Often to Clean It
For everyday use, a full clean every two to four weeks is a sensible rhythm. Move toward the shorter end if you have hard water, if the unit runs daily, or if it lives somewhere warm and humid like a garage bar or an RV. Beyond the scheduled clean, do a quick reset whenever the machine sits unused: always drain the reservoir and leave the lid open to dry out, because water left standing for a week is where most taste and odor problems start. A fast way to know you are overdue is the ice itself. If cubes come out cloudy, smaller than usual, or carry any taste or smell, the inside needs attention before you do anything else.
What You Will Need
You do not need special chemicals. White vinegar diluted in water handles both scale and most odor for the majority of units, and it is food-safe once rinsed. Mix roughly one part vinegar to ten parts water as a starting point. For heavier scale you can buy a dedicated ice machine descaler or use a citric acid solution, but vinegar covers routine cleaning. Round out the kit with a soft cloth or sponge, a small brush such as a clean toothbrush for tight corners and around the prongs, fresh water for rinsing, and a towel to dry the exterior. Skip bleach, abrasive scrubbers, and harsh kitchen sprays. They can leave residue, damage plastic and seals, and taint the next several batches of ice.
Step-by-Step: Cleaning the Inside
1. Unplug the ice maker and remove the ice basket. Dump any existing ice, since it will absorb whatever it touches. 2. Open the drain plug on the bottom or back and empty the water reservoir completely. 3. Mix your vinegar-and-water solution and pour it into the reservoir up to the fill line. 4. Wipe down the interior walls, the basket, and the lid with a cloth dipped in the solution, using the small brush to reach around the prongs and into corners. 5. Close the drain, plug the unit in, and run a normal ice-making cycle so the solution circulates through the pump and water lines. Let it complete one full cycle, then discard that ice. Run a second cleaning cycle if the unit was heavily scaled. 6. Unplug, drain the vinegar solution fully, and rinse the reservoir.
Rinsing and Drying Properly
Rinsing is the step people rush, and it is the one that decides whether your ice tastes clean. After draining the cleaning solution, fill the reservoir with fresh plain water and run a complete ice cycle, then throw that batch of ice away. Repeat with fresh water two or three times until the ice has no trace of vinegar smell or taste; sniff a cube to confirm. Once the water runs clean, drain the reservoir one final time, wipe the interior dry with a clean cloth, and leave the lid open for an hour or two so the inside air-dries fully. Drying matters because sealing a damp reservoir is exactly how biofilm starts to regrow. When everything is dry, refill with fresh water and make your first real batch.
Mistakes to Avoid
The most common error is under-rinsing, which leaves a sour vinegar note in the ice for days. Run extra water cycles until the smell is gone rather than guessing. Avoid bleach and strong disinfectants, which are hard to flush completely and can degrade seals and tubing. Never submerge the whole machine or run water into the vents and electronics; clean the interior reservoir, not the motor housing. Do not use metal tools or scouring pads on the prongs and walls, because scratches give scale and bacteria more surface to cling to. Finally, do not store the unit with water inside or the lid shut. A drained, open, dry ice maker between uses prevents most of the problems this whole routine is meant to fix.
When Cleaning Is Not Enough
A thorough clean fixes cloudy ice, odors, and most slowdowns. But if your machine still produces little or no ice, leaks, or never reaches temperature after a proper descale, the issue is likely mechanical: a tired compressor, a failing water pump, a stuck sensor, or low refrigerant in a sealed system that is not user-serviceable. Budget countertop units are often cheaper to replace than to repair, and an older model that needs constant babysitting may simply be worn out. If you have reached that point, it is worth comparing your unit against current options that hold a more reliable temperature and resist scale better. Our countertop ice maker reviews and picks break down dependable models by ice type, output per day, and price so you can decide whether to keep cleaning or upgrade.
Frequently asked questions
Can I use vinegar to clean a countertop ice maker?
Yes. A solution of about one part white vinegar to ten parts water dissolves mineral scale and neutralizes odor, and it is food-safe once you rinse thoroughly. Run two to three plain-water cycles afterward to remove any vinegar taste.
How long does it take to clean a portable ice maker?
Plan on about 30 minutes, most of it hands-off while the machine runs its cleaning and rinse cycles. Wiping the interior takes only a few minutes; the cycles and air-drying do the rest.
Why does my ice taste bad even after cleaning?
Usually it means the unit was not rinsed enough and still holds cleaning solution, or it was sealed up damp and biofilm started regrowing. Run extra plain-water cycles until the smell is gone, then store it drained and open.
Should I use bleach to clean my ice maker?
No. Bleach is difficult to flush completely from the reservoir and water lines and can damage seals and tubing. Stick with diluted vinegar or a dedicated food-safe ice machine descaler.