How to Clean a Kegerator: A Complete Maintenance Guide
Keeping your kegerator clean is key to great-tasting beer. This guide covers why, how often, and the step-by-step process to maintain your system for years of enjoyment.
To clean a kegerator, you need to flush the beer lines, clean the faucet and coupler, and wipe down the interior every time you change a keg or at least every two months. Regular cleaning prevents off flavors, bacteria buildup, and clogged lines, ensuring every pour tastes as fresh as the first.
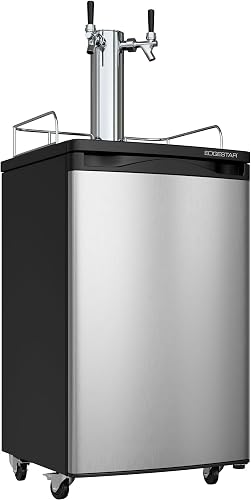
Whether you own a commercial unit like the TRUE Manufacturing 27682 or a home model like the EdgeStar KC2000SSTWIN, the cleaning process is similar. This guide walks you through the supplies you need, the step-by-step procedure, and the best practices to keep your kegerator running smoothly for years. By following this routine, you protect your investment and enjoy consistently great beer.


Why Cleaning Your Kegerator Matters
A dirty kegerator is the fastest way to ruin a good beer. Over time, yeast, bacteria, and beer stone (calcium oxalate) build up inside the lines, faucet, and coupler. This buildup not only affects flavor, causing sour or metallic tastes, but can also clog the system and reduce carbonation. Commercial units like the Beverage Air BM23C-B and home models like the Kegco K209SS-1 both benefit from regular cleaning. Owners who clean every keg change report consistently crisp pours and fewer maintenance issues months later. Skipping cleaning leads to expensive repairs and wasted beer. A simple clean routine keeps your kegerator performing like new.
Supplies You Will Need
Before you start, gather the right tools. You will need a kegerator cleaning kit, which typically includes a line cleaning solution (like BLC or a similar beer line cleaner), a faucet brush, a coupler brush, a bucket, and a cleaning pump or a simple hand pump. Alternatively, you can use a mix of warm water and a mild, non-abrasive cleaner. Avoid soap, as residues can affect foam. For the exterior, a soft cloth and stainless steel cleaner keep the door looking sharp. For models like the Continental Refrigerator KC90, pay attention to the tower and wall-mounted components. Having everything ready makes the process quick and easy.
Step 1: Disconnect and Depressurize
First, turn off the CO2 tank and disconnect the keg from the coupler. Open the faucet to release any remaining pressure. This step is crucial for safety and to prevent beer from spraying everywhere. Remove the keg and set it aside. If you have a dual-tap system like the Kegco K209SS-2, repeat for each side. For larger units like the TRUE TDD-4CT-HC, follow the same procedure. Once depressurized, pull the coupler off the keg post and take the faucet handle off. Place the faucet, coupler, and any removable parts into a bucket of warm cleaning solution to soak.
Step 2: Clean the Beer Lines
Attach the cleaning pump to your coupler or use a special line cleaning adapter. Fill a bucket with the cleaning solution according to the manufacturer's directions. Run the solution through the lines until it comes out the faucet clean. Let it sit for 15 to 20 minutes to break down residue. Then flush with fresh water until no solution remains. For home kegerators like the EdgeStar KC2000SSTWIN, this step is straightforward. For commercial models like the Beverage Air DD68C-1-B, you may need a longer soak. Skipping this step is the most common mistake, leading to off flavors.
Step 3: Clean the Faucet and Coupler
While the lines soak, scrub the faucet and coupler with a small brush. Pay attention to the internal passages and the ball bearings in the coupler. Rinse thoroughly with warm water. For tower-mounted systems like the Kegco K209SS-1, also clean the tower gasket. Dry all parts with a clean cloth. Reassemble the faucet and coupler once everything is dry. This step prevents bacteria from re-entering the clean lines. Owners who do this every keg change report that their faucets pour smoothly without sticking or foaming.
Step 4: Wipe Down the Interior
With the keg and lines removed, take the opportunity to clean the inside of your kegerator. Wipe down shelves, walls, and the floor with a solution of warm water and baking soda or a mild cleaner. Avoid harsh chemicals that could absorb into the plastic. For units with multiple shelves like the Continental Refrigerator KC90, remove them for a thorough clean. Check the drain (if available) and clear any debris. A clean interior not only looks better but also prevents mold and odors. After wiping, dry everything before placing a new keg inside.
Step 5: Reassemble and Sanitize
Before hooking up a new keg, sanitize all components that touch beer. Use a no-rinse sanitizer or a solution of one tablespoon of unscented bleach per gallon of water (followed by a thorough rinse). Reattach the coupler, faucet, and lines. Connect a new CO2 tank if needed. Purge the lines with a little beer before serving to remove any air. This final step ensures your first pour is perfect. For long-term satisfaction, set a reminder to clean every two months or after each keg. Your kegerator will thank you for years to come.
Frequently asked questions
How often should I clean my kegerator?
Clean your kegerator every time you change a keg or at least every two months. If you notice off flavors or foaming, clean immediately. Regular cleaning keeps your beer tasting fresh and extends the life of your system.
Can I use bleach to clean my kegerator lines?
You can use a diluted bleach solution (1 tablespoon per gallon of water) for sanitizing, but rinse thoroughly. For cleaning, use a dedicated beer line cleaner, as bleach may leave residue that affects flavor. Always follow with a fresh water flush.
Do I need a cleaning pump for my kegerator?
A cleaning pump makes recirculating solution through the lines easier, but you can use a simple hand pump or gravity method. For home kegerators like the EdgeStar KC2000SSTWIN, a hand pump works well. Commercial units may benefit from a pump for thorough cleaning.
What happens if I don't clean my kegerator?
Skipping cleaning leads to buildup of yeast, bacteria, and beer stone. This causes off flavors, sour or metallic tastes, foaming, and clogged lines. Over time, it can damage the faucet and coupler, requiring costly repairs. Consistent cleaning ensures great beer and longevity.